The Complete Vibe Coding Guide for Designers (2026)

How to work smart with AI, maintain your Design System, and build products that feel real
In 2026, nobody is impressed by “I made a prototype with AI” anymore.
Everyone has seen stunning UI generated in an hour. Everyone has seen demos that look flawless on the first screen, then completely fall apart on the second.
The questions that matter now are not “Does it work?” but:
How was it built?
Is it consistent?
Can it scale?
Will someone be able to continue from this in a month?
What’s impressive today is a designer who can take an idea and turn it into something that feels like a real product: with rules, consistency, a Design System, proper behavior, and a process you can trust.
This is exactly where Vibe Coding transforms from a trend into a real craft.
— -
What Is Vibe Coding (In Designer Terms)
Vibe Coding is not “learning to code”, and it’s not classic No-Code either.
It’s a workflow where you describe intent, and AI translates it into output: screens, flows, states, sometimes data, sometimes code.
But the real story isn’t the tool.
The real story is you.
Good Vibe Coding forces designers to shift from thinking in “screens” to thinking in “systems”:
- Components that repeat themselves
- Hierarchy that serves tasks
- Real states (not just pretty UI)
- Fixed rules for spacing and typography
- Screens that feel like one product, not a collection of pages

— -
How Designers Are Measured in 2026
Tools change. The criteria stay the same.
If you want to work properly with Vibe Coding, measure every tool by six questions:
1. Speed to Demo
2. Design System Fidelity
3. Component Consistency
4. States and Behavior
5. Path to Continuation
6. Data Connection
— -
The Biggest Advantage of 2026: Tools That Talk to Each Other (MCP)
Today, the big difference isn’t “which tool is smartest”.
The difference is whether your tools work like a team.
MCP (Model Context Protocol) is what makes that possible.
MCP in Plain Language
MCP is a connection layer that allows AI tools to work with your sources of truth instead of guessing.
Instead of every tool starting from zero and trying to “understand the design”, it can receive real context:
- Components
- Auto Layout
- Variables and tokens
- System naming conventions
- Code project structure
- Existing rules you’re already working with
In designer terms: MCP transforms AI from someone trying to imitate your design into someone translating it.
Without context, AI guesses:
“I think this is an H1”
“I think the spacing is 16px”
“I think this is a Primary button”
With real context, AI knows:
“This is your system’s H1”
“This is your spacing token”
“This is your existing Button/Primary component”
And that’s the difference between “same vibe” and “same product”.
If you want to see what this looks like in a real workflow, I broke it down step by step in a separate article that follows design intent from Figma all the way to code, without losing context at handoff points.
>>From Design to Code Without Losing Context: An MCP-First Workflow
— -
Connections That Actually Make a Difference
MCP isn’t theory. It changes outcomes.
Here are the connections that matter:
Figma → Cursor
Cleaner implementation, less guessing, more precision.
Figma → Claude (or other models)
Extract rules from the Design System: what exists, what’s allowed, what must stay consistent.
Repo → Cursor
Less duplication, fewer “new components by accident”, less spaghetti code.
— -
The Biggest Danger: Letting AI Replace the Designer’s Brain
The most common bug in Vibe Coding isn’t technical.
It happens in your head.
AI can generate something that looks good, works, and runs fast.
Then it becomes dangerously easy to say: “I trust it”, and stop thinking like a designer.
At that moment, you stop designing and start approving.
Symptoms appear fast:
- Visual hierarchy that doesn’t support the user’s task (but “looks fine”)
- Spacing inconsistencies that slowly creep between screens
- Components that look similar but aren’t actually the same thing
- A product that feels like a collection of pretty screens, not a real system
There’s an even deeper layer.
AI will generate a solution even when it has no idea if it makes sense UX-wise.
It’s not worried about edge cases, cognitive load, emotional context, or user mental models.
It’s committed to giving an answer.
That’s why your job stays critical.
Ask yourself:
- Why is this element here, does it support the task or just fill space?
- Is the sequence logical, or does it just “flow visually”?
- What happens before, after, and in edge cases?
- Would you defend this in a user interview?
The right framing is simple:
AI is the intern.
You’re the Lead.
It runs fast.
You decide what ships.

— -
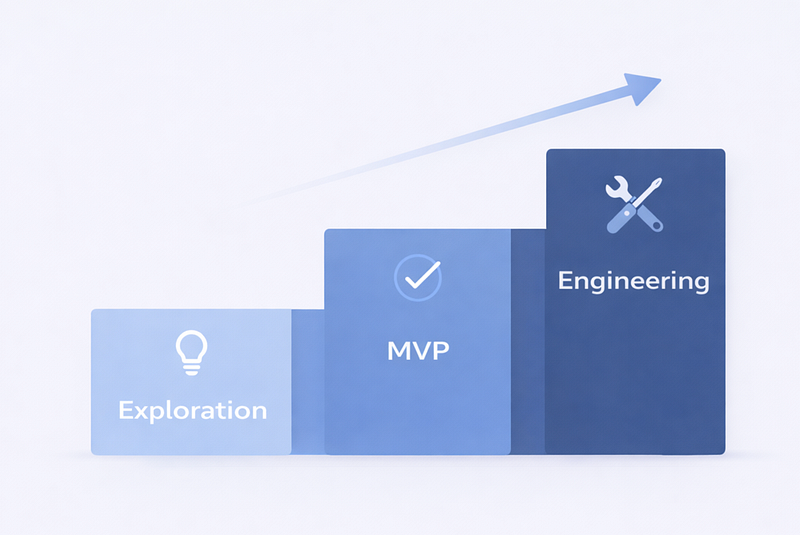
The 3 Layers of Vibe Coding (So You Pick the Right Tools)
Don’t ask “What’s the best tool?”
Ask:
What stage am I working in right now?
Layer 1: Exploration
Experiments, variations, quick demos.
Layer 2: MVP
A small working product with real flows and basic data.
Layer 3: Engineering
Quality, consistency, cleanliness, components, Git, continuation.
Most tools are great at Layer 1 or 2.
The real advantage in 2026 is bringing work to Layer 3 without losing your mind.
…
If you want a practical overview of which AI design tools actually hold up in real workflows, this guide breaks it down clearly: Best AI Design Tools for UI/UX Designers in 2026.
— -
The Tools That Actually Matter for Designers in 2026
There’s no “one winning tool”.
There’s a pipeline.
Think like a small studio: pick tools based on the job, then move forward.
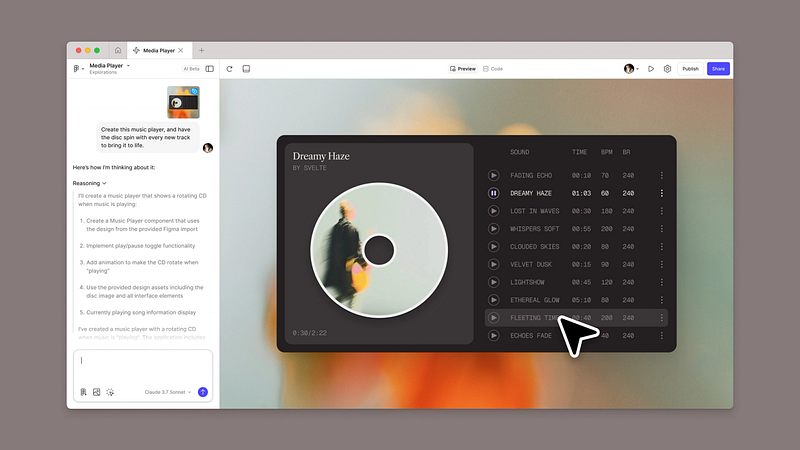
Figma Make
The most natural tool for designers because it starts from your language and your design files.
Best for: Layer 1 → Layer 2
Strengths: Native Figma flow, fast iteration, familiar mental model
Limitations: Can get messy without system discipline
— –
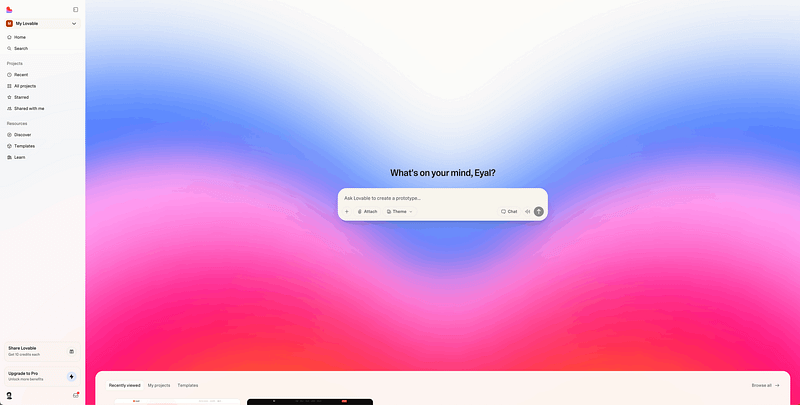
Lovable
Excellent when you need a working MVP with logic and data.
Best for: Layer 2
Strengths: Full-stack generation, data integration, fast MVP velocity
Limitations: Less control over pixel-perfect visual details
— –
v0 by Vercel
Clean React components with a production-ready feel.
Best for: Layer 2 → Layer 3 transition
Strengths: High-quality code output, component-driven structure
Limitations: Requires some technical comfort to customize deeply

— –
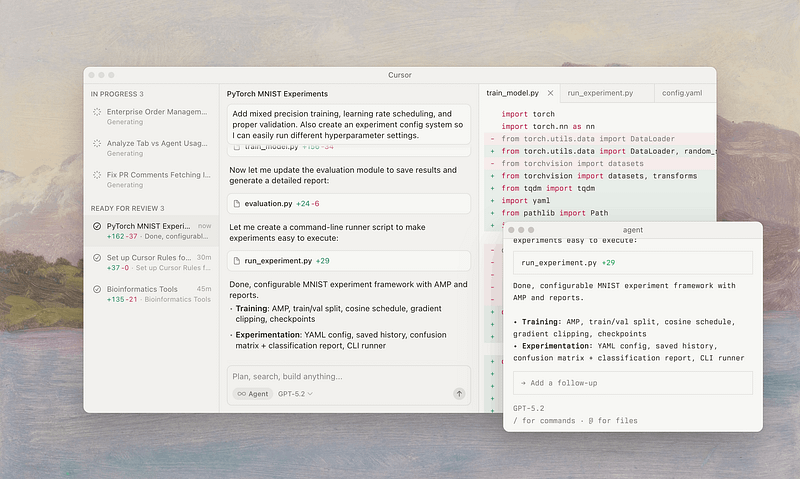
Cursor
Where everything becomes real: polish, consistency, unified components, and code you can continue from.
Best for: Layer 3
Strengths: Full IDE capabilities, codebase understanding, precise control
Limitations: Steeper learning curve, requires basic coding literacy
— –
Bolt
A great exploration tool to find direction fast without commitment.
Best for: Layer 1
Strengths: Super fast prototyping, no setup
Limitations: Not meant for production

— –
Claude Code (Optional)
Powerful for cleanup, refactoring, structure, and reducing chaos in AI-generated code.
Best for: Engineering support
Strengths: Intelligent refactoring, consistency support

— -
The Right Pipeline for Designers (2026)
The biggest mistake is choosing one tool and locking into it forever.
The right way is to move between stages.
Figma-First Route (Maximum Fidelity)
Figma → Figma Make → Cursor → Production
Best when you have a detailed Design System and need pixel-perfect implementation.
Fast MVP Route (Maximum Movement + Data)
Figma as reference → Lovable → Cursor → Production
Best when you need something functional quickly with real flows.
Direction-Finding Route
Idea → Bolt → Figma Make or Lovable → Cursor
Best when you’re still exploring and need validation fast.
— -
How to Achieve Maximum Precision Without Fighting AI
Precision doesn’t come from longer prompts.
Precision comes from clearer rules.
If you want output that feels like the same product:
Start with a Golden Screen
Pick one screen that perfectly represents your system. Use it as the reference point.
Don’t Let AI Invent Components
Always reference real components by name.
Say: “Use Button/Primary”
Not: “Make a blue button”
Introduce States Early
Loading, error, empty, success. From day one.
Work With Tokens, Not “Make It Pretty”
Say: “Use spacing-4 (16px)”
Not: “Add some space”
Do Polish Where You Have Full Control
Usually that’s Cursor.
Most importantly:
AI doesn’t get anxious when something doesn’t make sense.
You do.
And that’s your advantage.
— -
Advanced Techniques: Using AI as Your Hands, Not Your Brain
Build a System Prompt Library
Reusable prompts that encode your system rules.
Example:
“All buttons use Button/Primary, Button/Secondary, or Button/Ghost.
Never create new button variants.”
Use Visual References
Don’t just describe. Show.
- Screenshot your Figma components
- Include them in prompts
- Reference component names
Build Incrementally
Start simple, then add complexity:
1. Static layout with placeholder content
2. Add one interaction
3. Add states for that interaction
4. Add the next feature
5. Refactor when you see patterns
Version Control Is Your Friend
Even with AI-generated code:
- Commit after each working feature
- Write clear commit messages
- Roll back when AI goes sideways
— -
Common Pitfalls (And How to Avoid Them)
Pitfall 1: “Let’s Make Everything at Once”
Build one flow completely before moving to the next.
Pitfall 2: “The AI Should Just Know”
Be explicit about your system every time.
Pitfall 3: “This Demo Is Good Enough”
Ship demos. Build for continuation.
Pitfall 4: “I’ll Fix Consistency Later”
Consistency is easier to maintain than to retrofit.
Pitfall 5: “I Don’t Need to Understand the Code”
You don’t need to write it, but you must be able to read the structure.
— -
If I Had to Pick Only 2 Tools to Cover 80% of What You Need
If you’re starting today and you want the simplest setup that still gets real results, pick:
1. Figma Make
Fastest way to go from idea to a living demo, without switching mental models.
2. Cursor
The place where demos become a product foundation: consistent components, real structure, continuation-ready code.
In short:
Figma Make gets you to “this feels real” fast.
Cursor gets you to “this is buildable” long-term.
— -
The Skills That Matter Most in 2026
Technical skills are table stakes.
What separates good from great:
- Systems Thinking
- Clear Communication
- Knowing When to Stop
- Quality Bar Maintenance
- Comfort With Iteration
— -
In Summary: Vibe Coding Doesn’t Replace Designers, It Replaces Waiting
The advantage of a designer in 2026 isn’t knowing one more tool.
It’s knowing how to produce output that’s fast, precise, consistent, and feels like a real product.
AI can generate UI.
But only a designer can build a system with direction, rules, and logic.
Tools used to be isolated.
Now they’re starting to understand each other.
And when tools stop guessing and start working from shared context, Vibe Coding stops being magic and starts being a craft.
— –
The Practical Playlist (Start Here)
The Perfect Cursor AI Workflow (3 Simple Steps)
— –
I Built My Entire Design System in 4 Hours With AI. Full Tutorial (Claude + Cursor + Figma)
— –
Figma MCP + Cursor — Full Tutorial
— –
How To Move Your Lovable Project to Cursor (QUICK & EASY)
— –
DESIGN in v0, FINISH in Cursor | AI coding Tutorial
Looking for more daily inspiration? Download Muzli extension, your go-to source for everything design.
Related articles

Figma Just Opened the Canvas to AI Agents – Here’s What It Means for Designers

Lovable for Designers: The Complete Guide to Building Apps with AI (2026)

Google Just Introduced “Vibe Design” with Stitch. Here’s What It Means for UI Designers

Weekly Designers Update #543

Best AI Design Tools for UI/UX Designers in 2026

From Design to Code Without Losing Context: An MCP-First Workflow

How to Build a 2026 Design Portfolio: Why You Need More Than Just Pixels
More categories
Looking for more daily inspiration? Download Muzli extension your go-to source for design inspiration!
Get Muzli for Chrome

